Dataverse Integration
 Updated
Dataverse is an open source research data repository web application. It allows users to share, preserve, cite, explore and analyze research data while ensuring that the researchers, data authors, publishers, data distributors, and affiliated institutions all receive appropriate credit.
If you have a Dataverse repository, it is now possible to directly export your files or data from RSpace to Dataverse. This allows you to make use of all Dataverses’ features while still using RSpace as your primary storage space for research related content.
Configuring the Dataverse Application
The Dataverse Application is quick and easy to configure within RSpace:
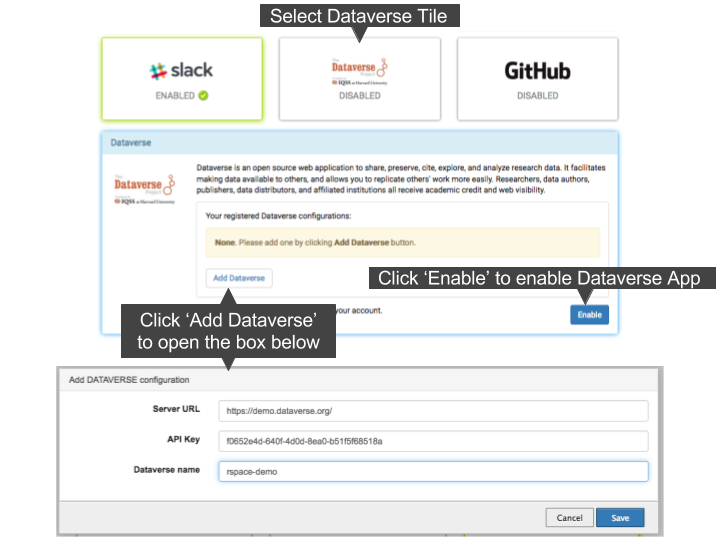
- Navigate to the Apps page within RSpace and click on the ‘Dataverse’ tile. A box will open below it as seen in the screenshot
- If the Dataverse App is currently disabled, click the “Enable” button to enable it
- Click the “Add Dataverse” button to add your repository's information
- In the form that opens, fill in the three fields:
- The ‘Server URL’ field is the URL of the Dataverse instance (of the form https://xxxxxxx.dataverse.org)
- The ‘API Key’ field is the API key for a user who has permission to submit to this repository (a string of the form xxxxxxxx-xxxx-xxxx-xxxx-xxxxxxxxxxxx). You can obtain your Dataverse API key from your Dataverse account settings.
- The ‘Dataverse name’ field is the identifier of the Dataverse repository. This is typically a single-word name that was entered when the Dataverse was created.
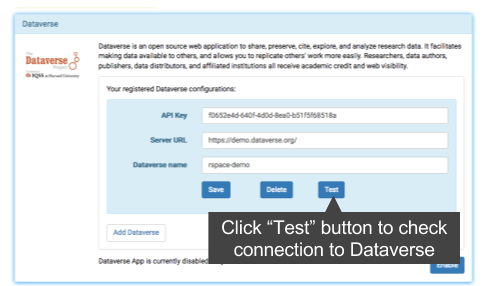
- Click ‘Save’
- To test the Dataverse connection, click the ‘Test’ button, if you have entered the information correctly a pop up notification should inform you it has succeeded
- If you wish to add additional Dataverse repositories simply repeat steps 3-6 above.
Exporting Content to Dataverse
Exporting content from RSpace to Dataverse is very simple. In addition, as well as exporting the Document, RSpace also ensures it is tagged with relevant metadata, such as the author, contact and Orcid ID (if you have entered your Orcid ID on RSpace).
- From within the Workspace select the Document you wish to export
- In the menu bar that appears click the “Export” button
- A dialog appears. Select the desired export format and select the 'Export to a repository' option. Then click 'NEXT'
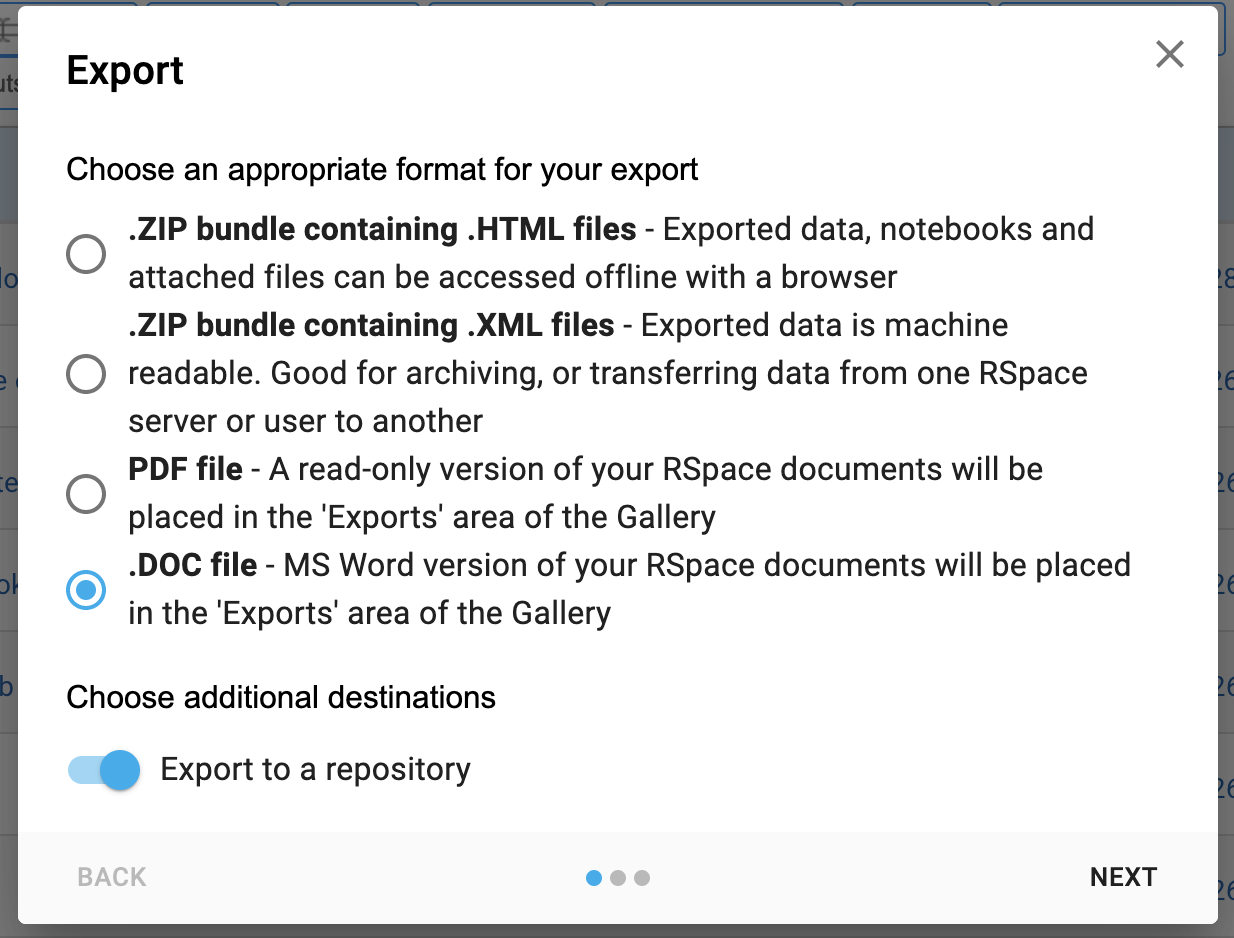
- Several options for the format of your export appear. Fill them out and click 'NEXT'
- Within the 2nd export popup, select the Repository you wish to export to (if you only have one Dataverse Repository configured, it will be selected by default).
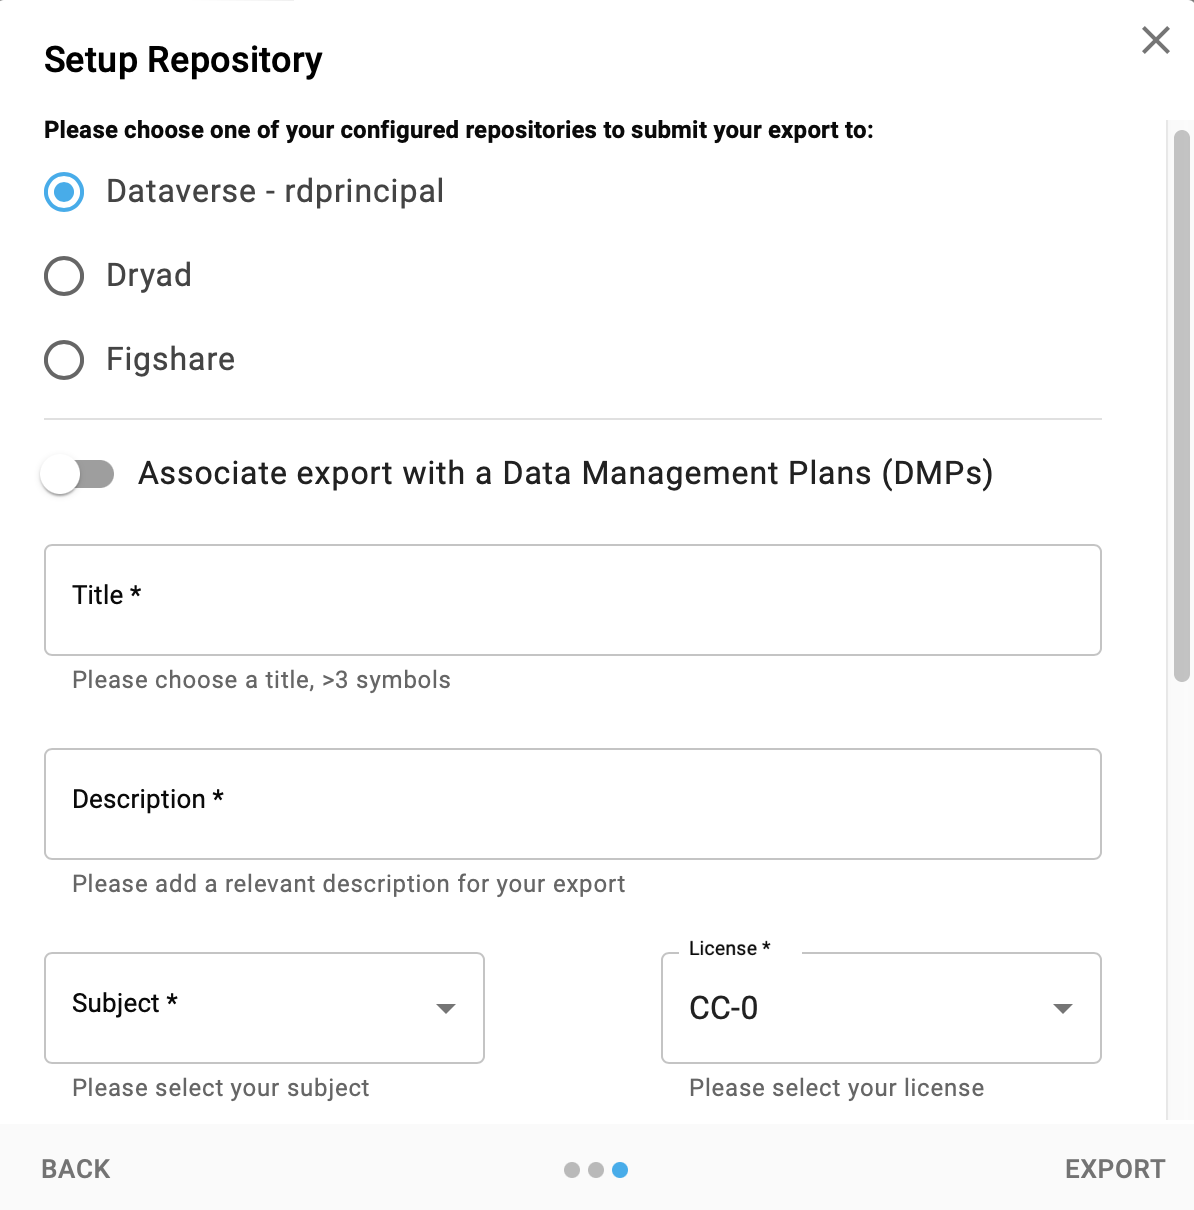
- If you've got the DMPTool (or similar Data Management tool) enabled, you will be able to associate the export with a DMP, which will automatically add a link to the export in the "related works" section of the DMP
- Enter values into the fields listed:
- All the fields are required
- There must be at least 1 author and 1 contact, others may be added using the “Add” button
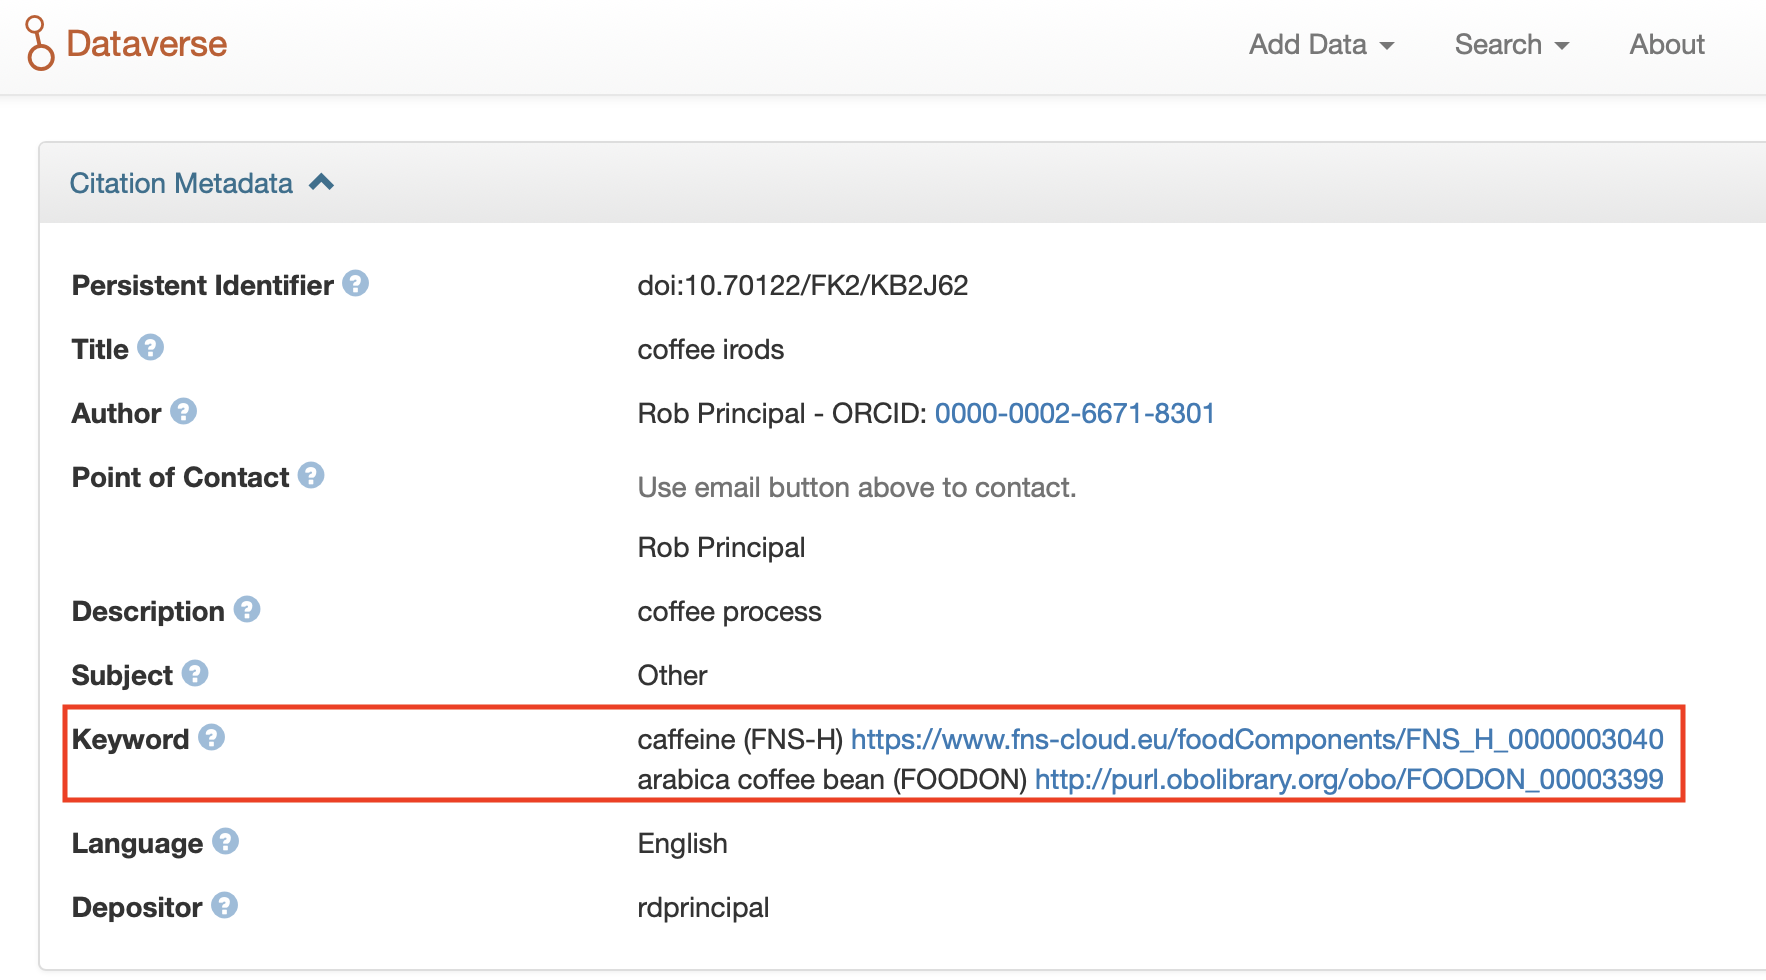
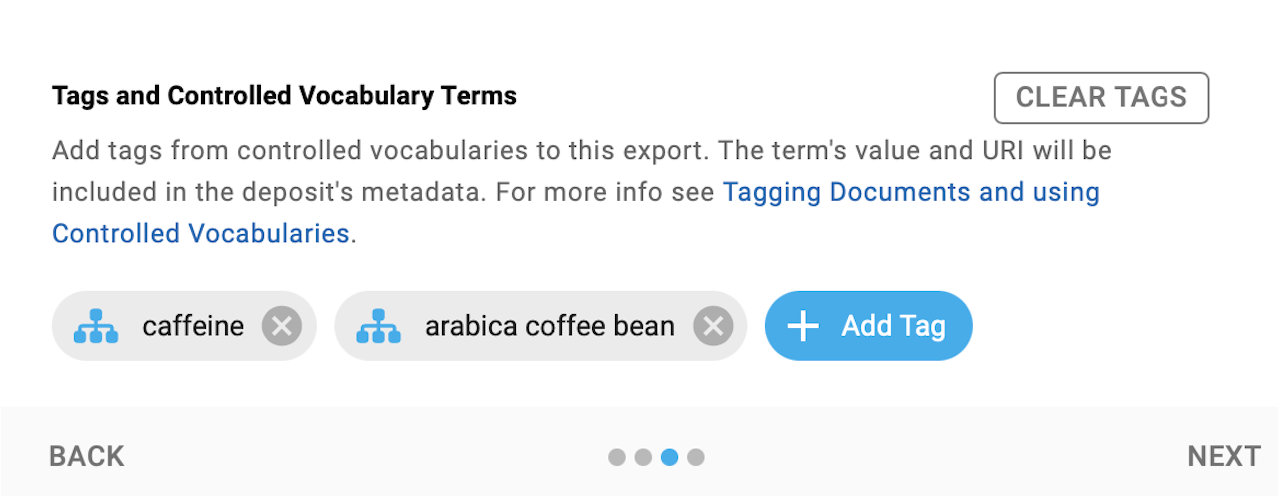
- You can optionally also add custom or bioportal-derived tags to your export and these will be added to Dataverse keyword filed as metadta:
- Click “EXPORT”
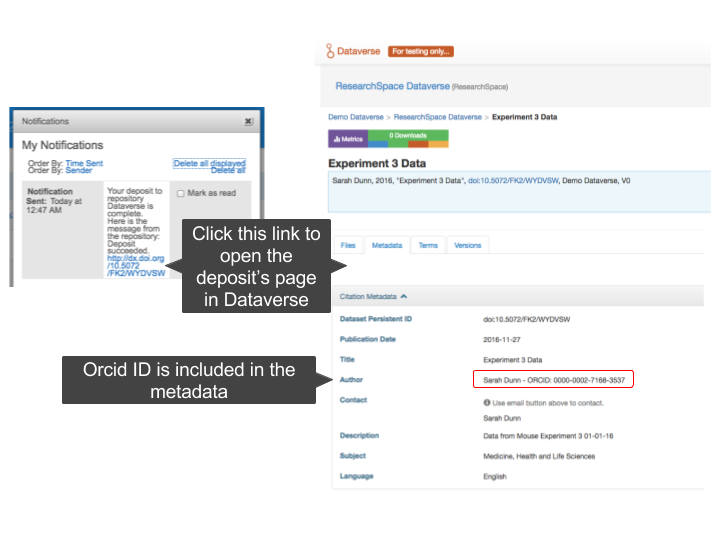
- After a short delay two new notifications will appear:
- The first should inform you that the export has been generated
- The second should inform you that the deposit has succeeded and contain a link to the external Dataverse page corresponding to the deposit
If you click on the link within the notification, it will take you to the Dataverse page corresponding to the deposit. Here you can see that metadata such as authors, contacts, title and description have been added along with the deposit. In addition, your Orcid ID will be present alongside your name if you have entered it into your profile within RSpace.
If you added tags to your export you shoud see the tags in the dataverse deposit metadata > keywords area: